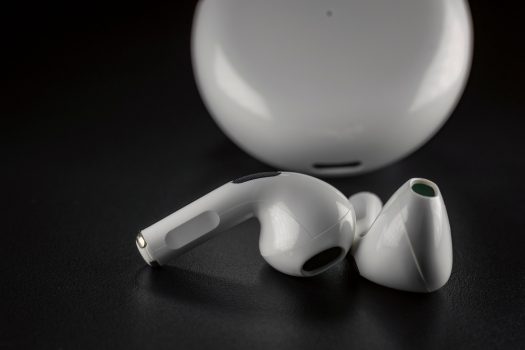
The reset process for Oraimo Riff earbuds typically takes around 30 seconds to complete. Resetting your Oraimo Riff earbuds can be an essential troubleshooting step to resolve various issues such as connectivity problems, audio glitches, or unresponsiveness. This detailed guide will walk you through the entire process from the moment you pick up your earbuds to successfully resetting them. By following these steps, you can ensure your earbuds return to optimal performance.
Before diving into the reset process, it’s important to understand why you might need to reset your Oraimo Riff earbuds:
- Connectivity Issues: If your earbuds are having trouble connecting to your device or frequently disconnecting, a reset can help re-establish a stable connection.
- Audio Problems: Issues like one earbud not producing sound, low audio quality, or static can often be resolved with a reset.
- Unresponsiveness: If your earbuds are not responding to touch controls or commands, a reset can restore their functionality.
- Pairing Errors: Sometimes, the earbuds may fail to pair with new devices or struggle to switch between paired devices. Resetting them can clear these errors.
Step-by-Step Guide to Resetting Oraimo Riff Earbuds
Step 1: Preparation
Gather Your Earbuds and Charging Case
- Ensure the Charging Case is Charged: Verify that your Oraimo Riff charging case has sufficient charge. This ensures that the earbuds can complete the reset process without interruptions.
- Pick Up Your Earbuds: Remove both earbuds from the charging case.
Identify the Problem
- Check for Issues: Determine the specific problem you are experiencing with your Oraimo Riff earbuds, such as connectivity problems, one earbud not working, or audio distortions. This will confirm that a reset is necessary.
Step 2: Initial Steps
ower Off the Earbuds
- Manually Power Off: Press and hold the touch-sensitive area on each earbud for about 5 seconds until the LEDs turn off, indicating that the earbuds are powered down.
Place Earbuds Back in the Charging Case
- Insert the Earbuds: Place both earbuds back into the charging case.
- Wait for the LEDs: Ensure the LEDs on the earbuds light up to indicate they are properly placed and charging.
Step 3: Resetting the Earbuds
Perform the Reset
- Open the Charging Case: With the earbuds inside, open the charging case.
- Initiate the Reset: Press and hold the button on the charging case for about 10 seconds. This button is usually located on the inside of the case, either between or near the earbuds.
- Watch for the LEDs: The LEDs on the earbuds should blink in a specific pattern (e.g., white or blue flashes) indicating that the reset process has started.
- Complete the Reset: Continue holding the button until the LEDs change their pattern (e.g., a rapid series of blinks), indicating that the reset is complete.
Step 4: Reconnect the Earbuds
Remove the Earbuds from the Case
- Take Out the Earbuds: Remove both earbuds from the charging case.
- Automatic Pairing Mode: The earbuds should automatically enter pairing mode once taken out of the case. The LEDs on the earbuds will start flashing, indicating they are ready to pair.
Pair with Your Device
- Turn on Bluetooth: Ensure Bluetooth is enabled on your smartphone or other device.
- Find Oraimo Riff: In the Bluetooth settings, look for “Oraimo Riff” in the list of available devices.
- Select and Pair: Tap on “Oraimo Riff” to connect. You may hear a confirmation sound in the earbuds, indicating they are successfully paired.
Step 5: Troubleshooting
Verify the Reset
- Test the Connection: Play some audio to ensure both earbuds are working correctly and the issue has been resolved.
- Check for Improvements: Confirm that the problems you were experiencing (e.g., connectivity issues, audio glitches) have been fixed.
Additional Tips
- Software Updates: Ensure your device’s software and the earbuds’ firmware are up-to-date. Sometimes, issues can be resolved with a simple update.
- Repeat if Necessary: If the reset process does not resolve the issue, repeat the steps or consult the user manual for further assistance.
Conclusion
Resetting your Oraimo Riff earbuds is a straightforward process that can resolve many common issues. By following these detailed steps, you can ensure that your earbuds are functioning correctly and providing the best possible audio experience. Whether you’re facing connectivity issues, audio problems, or unresponsiveness, a reset can often restore your earbuds to optimal performance.
If you’re still experiencing issues or need further assistance, consider reaching out to Oraimo customer support for professional help. Additionally, if you’re looking for reliable and high-quality earbuds, explore the range of options available from Oraimo and other reputable brands. Investing in a good pair of earbuds can significantly enhance your audio experience, whether for work, exercise, or casual listening.


