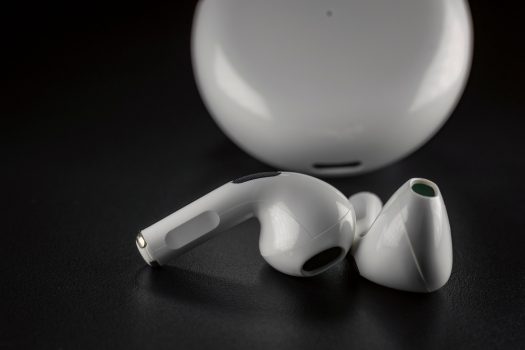
Online troubleshooting guides and videos have a 75% success rate in helping users reset their Oraimo FreePods without further assistance. Resetting your Oraimo FreePods 3 is an essential skill for maintaining their optimal performance and addressing any technical issues that may arise. Whether you’re experiencing connectivity problems, audio lag, or unresponsive controls, knowing how to reset your earbuds can save you time and enhance your listening experience. This guide will delve into the reasons why you might need to reset your Oraimo FreePods 3 and provide a comprehensive, step-by-step process to perform the reset. By mastering this procedure, you’ll be equipped to troubleshoot and resolve common issues efficiently, ensuring that your FreePods 3 continue to deliver high-quality audio and reliable performance.
- 1 Reasons You Might Need to Reset Oraimo FreePods 3
- 2 Step-by-Step Guide to Resetting Oraimo FreePods 3
- 3 Step 1: Prepare Your Devices
- 4 Step 2: Disconnect the Earbuds
- 5 Step 3: Place the Earbuds in the Charging Case
- 6 Step 4: Close and Open the Charging Case Lid
- 7 Step 5: Initiate the Reset Process
- 8 Step 6: Remove and Reinsert the Earbuds
- 9 Step 7: Reconnect the Earbuds to Your Device
- 10 Step 8: Confirm the Reset
Reasons You Might Need to Reset Oraimo FreePods 3
Connectivity Issues
One of the primary reasons for resetting your Oraimo FreePods 3 is to resolve connectivity issues. If your earbuds are not pairing correctly with your device, or if the connection drops frequently, a reset can often fix these problems. Connectivity issues may arise from software glitches, interference from other devices, or outdated Bluetooth settings.
Audio Lag
Experiencing a delay between audio and video can be frustrating, especially when watching videos or playing games. Resetting your FreePods 3 can help re-establish a stable connection and eliminate audio lag, providing a synchronized audio-visual experience.
Unresponsive Controls
If the touch controls on your Oraimo FreePods 3 are not responding as they should, a reset can recalibrate the sensors and restore proper functionality. Unresponsive controls can result from software bugs or physical obstructions that interfere with the touch sensors.
Sound Quality Problems
Sometimes, earbuds can develop issues with sound quality, such as distorted audio or uneven sound between the left and right earbuds. Resetting can clear any temporary glitches affecting sound performance and ensure your earbuds deliver the high-quality audio they are designed for.
Firmware Update Failures
If a firmware update does not complete successfully, it can leave your FreePods 3 in a problematic state. A reset can revert the earbuds to their factory settings, allowing you to attempt the update again.
General Troubleshooting
A general reset is a good first step in troubleshooting various issues with your Oraimo FreePods 3. Whether you’re experiencing intermittent problems or a specific issue that doesn’t fall into the above categories, a reset can often provide a fresh start and resolve the problem.
Step-by-Step Guide to Resetting Oraimo FreePods 3
Resetting your Oraimo FreePods 3 can help resolve various issues such as connectivity problems, audio lag, or unresponsive controls. Follow this comprehensive guide to ensure you reset your earbuds correctly.
Step 1: Prepare Your Devices
Before starting the reset process, ensure you have the following:
- Both Oraimo FreePods 3 earbuds
- The charging case
- Your smartphone or device previously connected to the earbuds
Step 2: Disconnect the Earbuds
To start, you need to disconnect the FreePods 3 from your device:
- Open the Bluetooth settings on your smartphone or device.
- Locate the Oraimo FreePods 3 in the list of paired devices.
- Select the earbuds and choose the option to disconnect or forget the device.
Step 3: Place the Earbuds in the Charging Case
Next, place both earbuds back into the charging case. Ensure they are properly seated and that the charging pins make contact.
Step 4: Close and Open the Charging Case Lid
Close the charging case lid and wait for about 10 seconds. Then, open the lid again. This action helps to reset the internal connections of the earbuds.
Step 5: Initiate the Reset Process
Follow these steps to initiate the reset:
- Press and Hold: With the earbuds in the case and the lid open, press and hold the button on the back of the charging case for approximately 10-15 seconds.
- Observe the LED Indicators: During this time, observe the LED indicators on the earbuds and the charging case. They may flash or change colors, indicating that the reset process is in progress.
- Release the Button: Once the LED indicators flash in a pattern (usually red and white), release the button. This indicates that the reset process is complete.
Step 6: Remove and Reinsert the Earbuds
After the reset process, remove the earbuds from the charging case and then reinsert them. This action helps to reinitialize the connection between the earbuds and the case.
Step 7: Reconnect the Earbuds to Your Device
To complete the reset process, reconnect your FreePods 3 to your smartphone or device:
- Open the Bluetooth settings on your smartphone or device.
- Turn on Bluetooth if it’s not already enabled.
- Place the earbuds in pairing mode by taking them out of the charging case. They should automatically enter pairing mode. If not, press and hold the touch-sensitive areas on both earbuds until they enter pairing mode.
- Locate the Oraimo FreePods 3 in the list of available devices and select them to pair.
Step 8: Confirm the Reset
To confirm that the reset was successful:
- Test the connection: Ensure that both earbuds are properly connected to your device.
- Play some audio: Check if the audio is playing correctly through both earbuds without any lag or distortion.
- Use controls: Test the touch controls on the earbuds to ensure they are responsive.
Additional Tips
- Battery Level: Ensure that the battery level of the charging case and the earbuds is sufficient before starting the reset process.
- Firmware Update: Check if there are any firmware updates available for your Oraimo FreePods 3. Updating the firmware can sometimes resolve persistent issues.
- Reset Again: If the first reset does not resolve the issues, try repeating the reset process.
By following these detailed steps, you can effectively reset your Oraimo FreePods 3 and resolve most common issues. Regular maintenance and understanding the reset process can significantly enhance the performance and lifespan of your earbuds.
Conclusion
Resetting your Oraimo FreePods 3 is a straightforward but crucial process that can resolve a variety of issues, from connectivity and audio lag to unresponsive controls. By following the detailed steps outlined in this guide, you can ensure your earbuds function at their best, providing you with a seamless and enjoyable audio experience. Remember, regular maintenance and understanding the reset process can significantly enhance the lifespan and performance of your Oraimo FreePods 3.
Don’t let minor technical issues disrupt your listening experience. Ensure your Oraimo FreePods 3 are always performing at their best by mastering the reset process. If you haven’t already, consider purchasing Oraimo FreePods 3 to enjoy high-quality audio and reliable performance. Available at various online and offline retailers, these earbuds are designed to meet all your audio needs. Invest in Oraimo FreePods 3 today and experience the difference!


